Select a help topic below. Click any image to view larger.
General
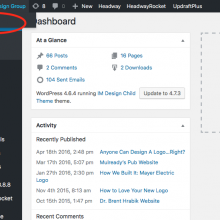
Once you login, you’ll see the WordPress Dashboard. On the left hand side, you’ll see a menu with several options. Below is overview of some of the basic WordPress options. You can also view your website statistics from the dashboard. These basic statistics show you Page Views. Page views are the total number of times the page was accessed. You can click the View All button to see more data. On this page, you can click Show Summaries in the upper right for weekly and monthly page view summaries, with percentage change.
Posts
If you have a blog on your site, this is the area where you’ll create or edit blog posts
Media
This is the library of images used on your website.
Pages
This is the area where you’ll create or edit your site’s pages
Profile
You can change your password here
 You can view basic stats by clicking Dashboard in the left hand column.
Pages
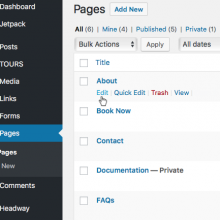
Find the page you want to edit by clicking Pages from within the WordPress dashboard:
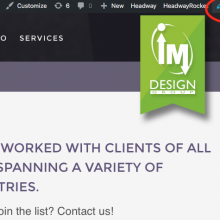
Alternately, you can go out to the “front side” of your website, and navigate to the page you want to edit:
Posts (for websites with blogs)
Blog posts stack in order from newest to oldest.
The WordPress Editor
Specifics for editing Pages or Posts
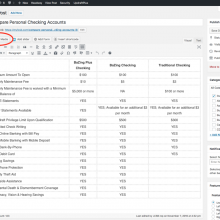
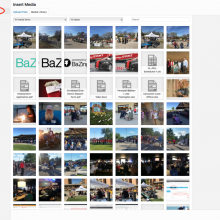
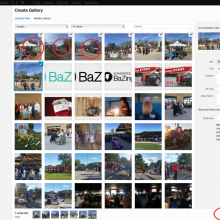
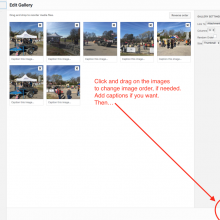
You can easily add links to other sites. For example, if you want the words “click here” to be a hyperlink to another site, just type “click here” into your WordPress post. Highlight the text, and click the button above that looks like a chain link. You’ll get a pop up window where you can paste in the URL of a link. Also, within this pop-up window, you can link to other posts or pages on your own site by clicking the icon that looks a Gear symbol, and selecting the post or page from the drop down list. YouTube videos will automatically embed into your post. Go to YouTube and find the video you want to add. Copy the URL address of the video (i.e., http://www.youtube.com/example123), and then paste that into your post. Click on Set Featured Image in the right hand column. You’ll get a pop up window – You may drag and drop an image onto this window, or click “select files” and locate the photo on your computer. Click the blue button in the lower right corner that says “Set featured image” to add it to your page or post. Adding a featured image will display your photo as a large, full width image at the top of your page/post. Featured images are automatically cropped to the same size, which gives a consistent look to your page/post. Each page/post can only have one featured image. All featured images are horizontal, so if you want to add a vertical or square image, it’s best to use method two. Click anywhere in the body (text) of your page/post, and then click the button that says “add media” above. You’ll get a pop up window – You may drag and drop an image onto this window, or click “select files” and locate the photo on your computer. Click the blue button in the lower right corner that says “Insert into post” to add it to your post. Once the image appears within your document, you can click on it to change it’s alignment (center, left, right, none) or drag the corners to resize it. You can add as many images in the body of your page/post as you want, resize and align them as you like. EDIT A GALLERY AFTER YOU’VE ADDED IT TO POST:
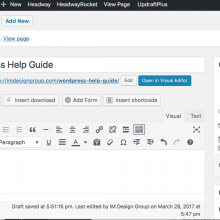
You’ll use the WordPress editor whenever you create or edit pages or posts. Below is a quick overview of the different areas of the editor.
 Title of your post or page
You can add images in three ways:
METHOD ONE:
METHOD TWO:
METHOD THREE:
Status
A post or page can be saved as a draft, published, or pending review. ONLY posts/pages that are “published” will be visible to the public on your website. You can start writing a post or page, save it as draft, and finish it later. You could also mark your post/page as “pending review” to let another co-worker know to read over it before publishing it. Even after a post or page has been “published”, you can always go back and edit it, delete it, or move it back into draft mode.
Visibility
ONLY posts or pages that are “public” will be visible to public users of your website. You can also mark posts/pages as “Private” or password protect a post.
Publish Date
You can edit this date on ANY post or page, but it is espescially useful for blogging. You can pre-schedule blog posts by setting a future date, and the post will automatically appear on that date. Also, remember that posts stack on top of each other in descending order from newest to oldest. If you want one post to appear before another, you can edit its date to change its order in the stack.
Messages from Contact Forms
Navigation
Menus can be a bit tricky. Please call us 620-343-3909 or email [email protected] if you need help.
Editing Homepage Slideshows
From the dashboard, Click Meta Slider
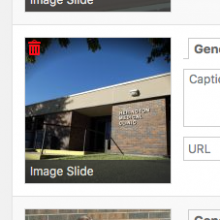
To Delete and Image from the slideshow:
- Hover over the image until a red trash can icon appears in the top left corner of the image. Click the trash icon to delete.
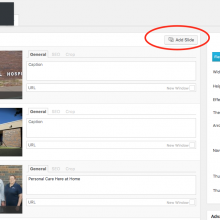
To Add an Image to the slideshow:
- Click the Add Slider button
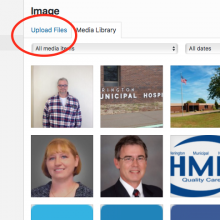
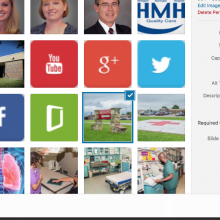
- Select an image from your media library, OR click upload image to upload a new image from your computer
- Click Add to Slider near the bottom right
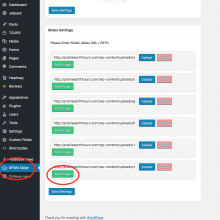
- From the dashboard, Click RFWB Slider
- Click any of the green Add Image buttons, which will add a new row with a blank image box
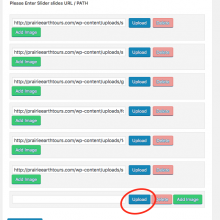
- Click Upload next to the blank image box you just added
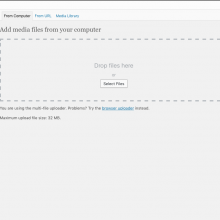
- Select an image from your computer
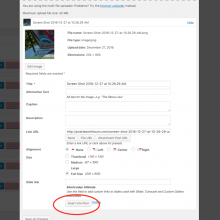
- Click Insert into Post. You shouldn’t need to change any other settings in this box.

